Hello!
Happy Friday! And happy December! I hope you are as excited as I am that the festive season is well and truly upon us. Despite all the unpacked boxes and general chaos that comes with moving, our Christmas tree is up, and we have spent the evenings admiring it in our camping chairs (soon to be replaced by a sofa, we hope!).
Above all else that Christmas brings, the total ridiculous excess of food and indulgence is surely the best part. So, I am going to share some fun, festive recipes over the next few weeks that will hopefully add to the groaning cupboards and fridges in your houses. These will, of course, include plenty of useful tips and tricks for essential pastry techniques that will come in handy all year round.
This week is all about beautiful flaky pastry, and one of the easiest things you can make with it: a galette. A galette is basically a free form pie/tart/cake depending on what you use, and so is perfect for making a simple but delicious dish. It requires no specialist equipment besides a big mixing bowl and rolling pin, and you can fill it with pretty much whatever you heart desires, sweet or savoury. I’d recommend using vegetables or fruit with a relatively low water content to prevent sogginess, but pre-roasting can assist with this.
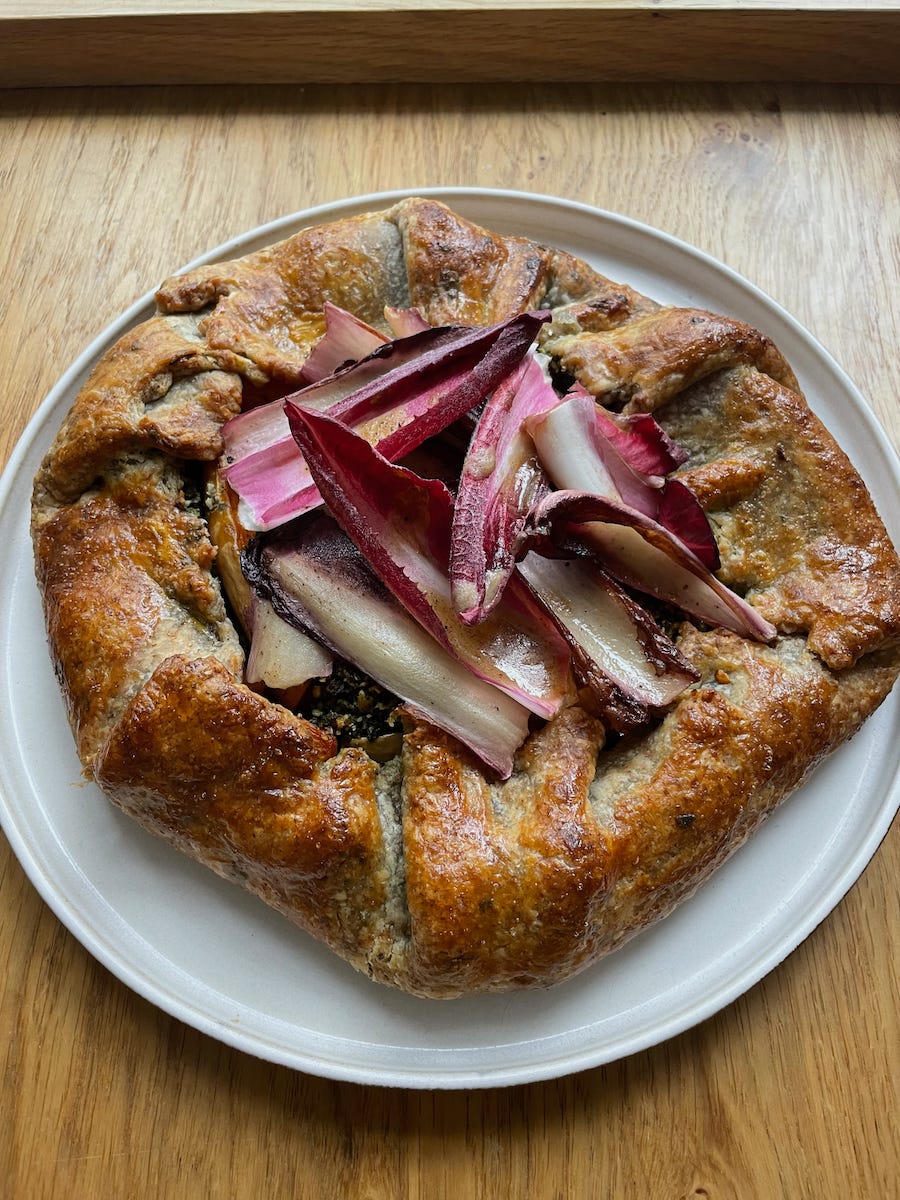
The recipe I am sharing with you is a savoury galette of butternut squash with sage three ways: sage pastry, sage pesto, and a sage & brown butter dressing. So, you are essentially getting three recipes in one (a veritable recipe bonanza). If you don’t have the time or energy to make the whole thing, you can simply make the filling into a nice salad, or a galette with a simpler filling. Pick and choose what suits you and the ingredients you have available!
Brown Butter
One of these recipes is for a sage and brown butter dressing. It is now my favourite way to make a dressing, as you can infuse the butter with whichever herbs you like. Browning butter is also a great skill to have for enhancing the flavour of anything from almond cream to pastry itself. Put simply, we are heating the butter to the point where the milk solids caramelise. This creates a nutty, toasty aroma and taste, and enhances the butter to make it richer and, basically, more exciting to eat.
Flaky Pastry
Before we get started with the recipe, a little note about flaky pastry. In a previous newsletter, we covered all things sweet pastry. I’d recommend taking a look at this, because the principles are much the same. In essence, the butter coats the flour to prevent gluten from forming, but we leave much larger pieces of butter in the mix. This is to help create a lovely flaky crust - when the pastry is baked, the water present in the butter evaporates and produces steam, thus creating nice little pockets of air that give you a flaky pastry. The larger pieces of butter will leave behind larger air pockets, making things much flakier. We also perform three folds with the pastry - we’ll go into more detail on this another time, but essentially folding the pastry creates layers, which will create a little extra flakiness in our pastry when it bakes.
Unlike most other pastry doughs, we use strong white bread flour for this. Plain flour would also work if needed, however as we are creating a free-form pastry (i.e. no ring or tart tin to build and bake in), it’s good to have a little additional strength from the protein in the flour.
As when making any pastry, it’s really important to keep everything nice and cold. Some people swear by putting all their ingredients in the freezer first, but honestly I never have space in my freezer to do that, and I’m not sure it’s entirely necessary. Instead, just make sure you are keeping things cool, and if your pastry starts to feel soft or warm at any point during the process, chill it in the fridge for 20 minutes.
And, if you decide not to make a galette with this pastry, you can use it in plenty of other ways. It makes a lovely base for a tart or quiche, as well as a more rustic pie, and I love using this pastry for mince pies (we will visit this shortly!). Alternatively, you can make a sweet galette - a layer of crème pat topped with roasted apples and baked following the recipe below would be delicious!
My Trusty Flaky Pastry
Ingredients
100g strong white bread flour
100g wholemeal/dark rye flour
1 tbsp caster sugar
1 tsp fine sea salt
160g butter, very cold
60g ice-cold water
Small bunch of sage leaves, roughly chopped (about 8 leaves)
Rye flour is relatively easy to get hold of from most supermarkets. However, if you can’t find any or don’t want to buy any, you can replace it with more strong white bread flour. The sage is an optional addition here - if using the pastry for something else, you can, of course, omit it from the recipe!
Method:
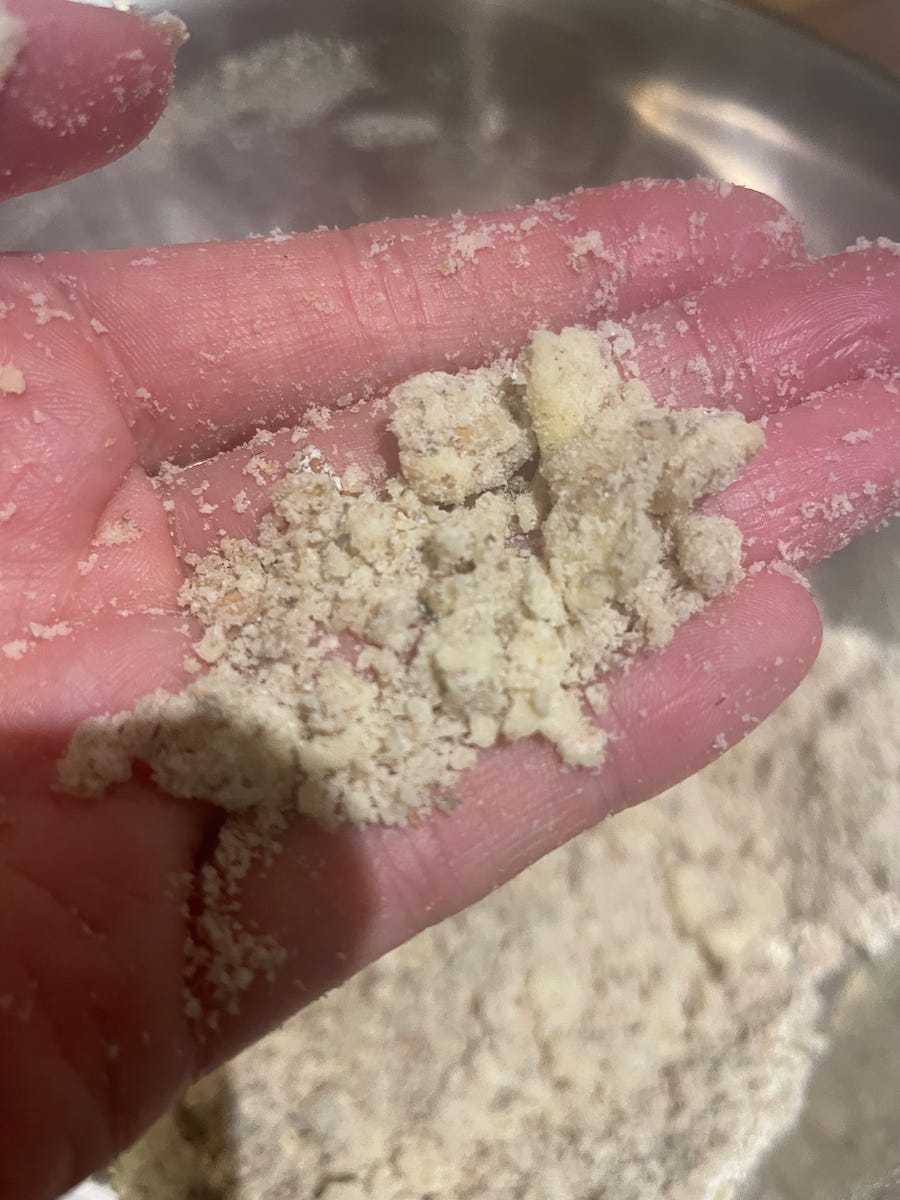
Combine the rye flour, strong white bread flour, sugar and sea salt in a large bowl. Add the cold butter and use your fingertips to rub it into the dries, working as quickly as you can. Do this until the mix starts to resemble breadcrumbs, but you can still see some pea-sized pieces of butter in the mix. If at any point the butter feels particularly soft, put in the fridge to chill before continuing.
Quickly incorporate the cold water until it comes together to form a very rough, crumbly dough, then tip onto a clean work surface and bring together into a dough. Try to handle it as little as you possibly can, and don’t worry if it feels crumbly.
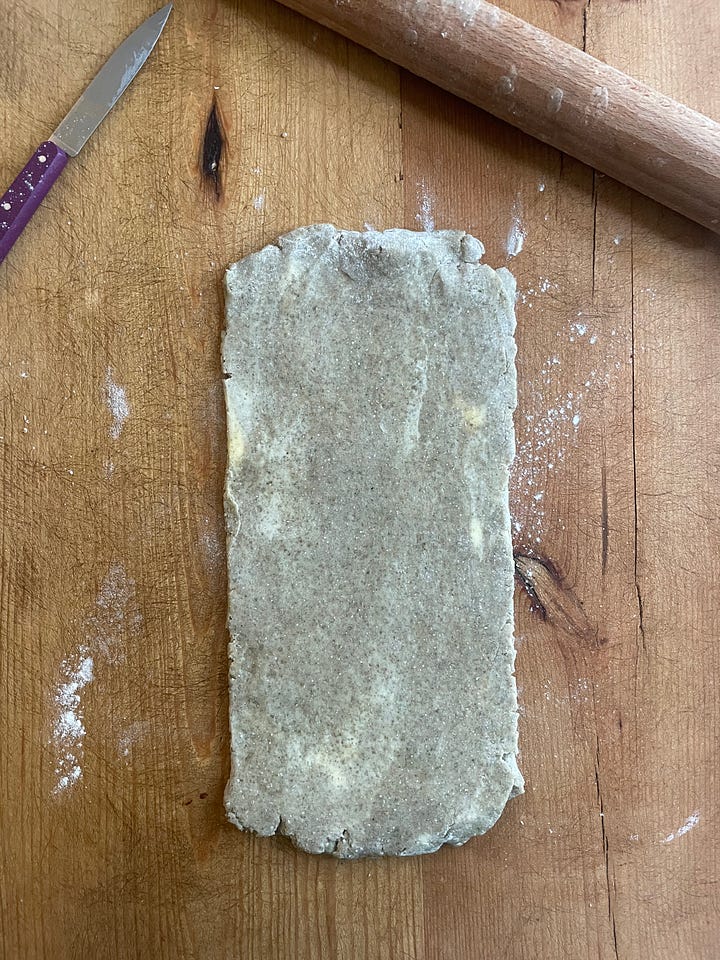
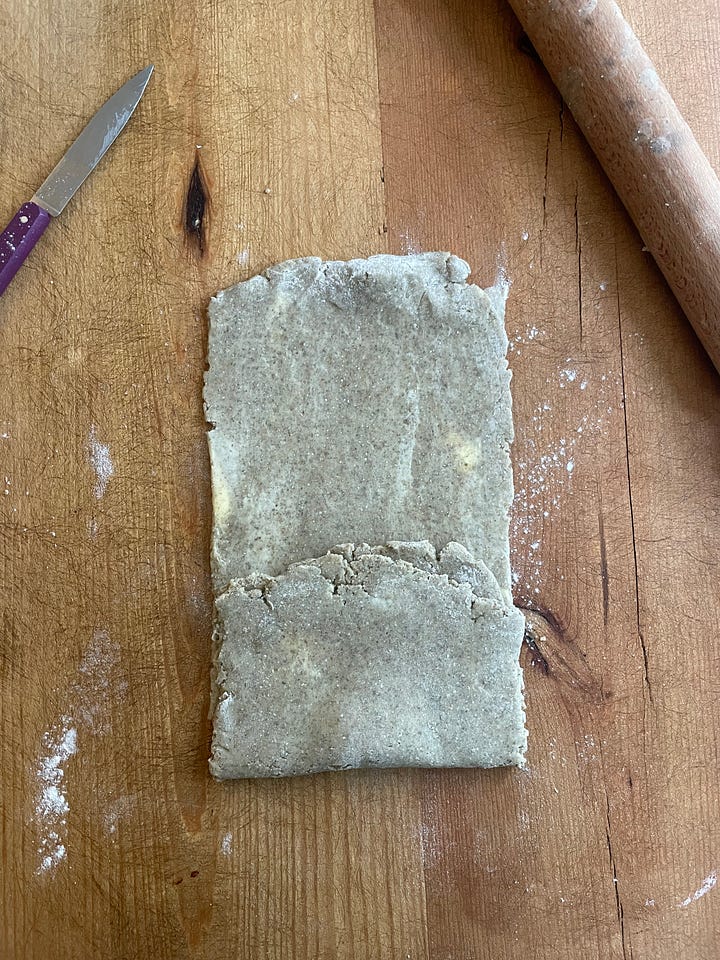
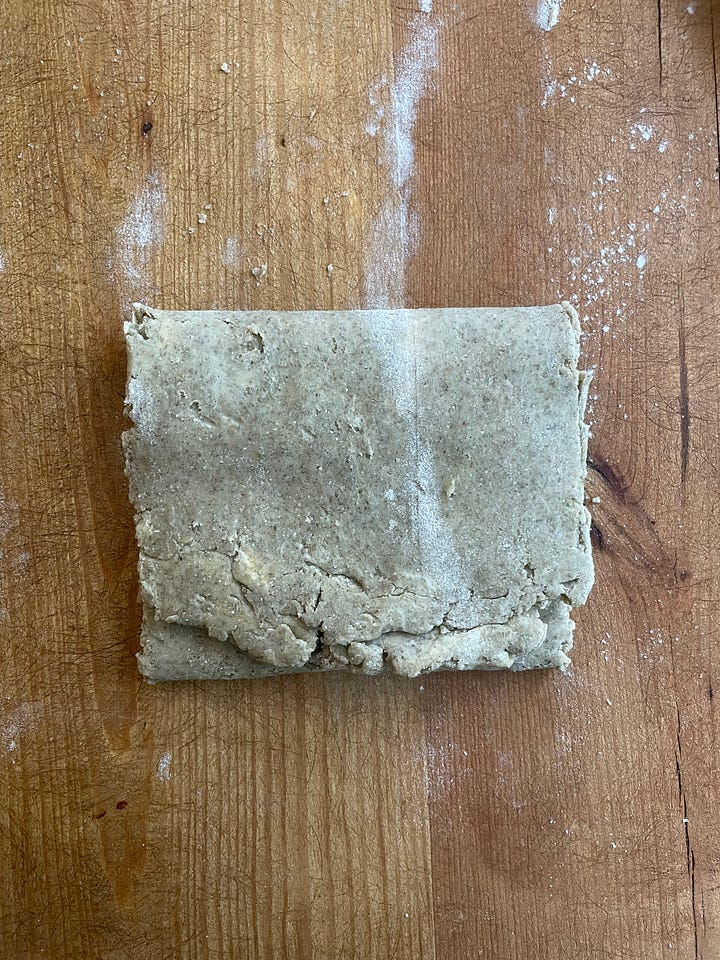
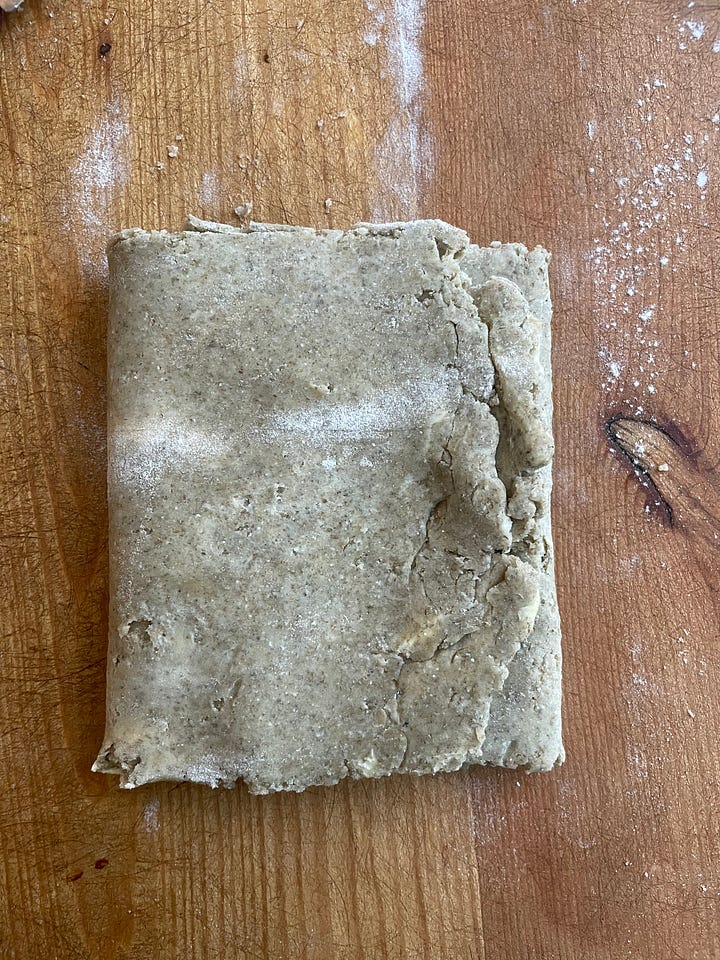
Dust the surface with a little flour, then roll the pastry into a rough rectangle. Fold the bottom towards the middle, and the top down over the bottom – imagine you are folding a piece of A4 paper to fit in an envelope (see below pictures for a guide), then turn 90 degrees. Repeat twice, then pop the pastry into a tupperware and chill for a minimum of 2 hours.
Butternut Squash Galette with Sage Three Ways
Makes one large galette (enough for around 6 people) with leftovers of the filling - have them for lunch!
Ingredients
(For the butternut squash)
One butternut squash (or alternative seasonal vegetable!)
3-4 tbsp olive oil
1 tsp crushed chilli flakes
1/2 tsp fine sea salt
(For the sage pesto)
30g pumpkin seeds (or seeds of your choice) along with the seeds you saved from your squash earlier
15g sage leaves (just shy of a full packet. There should be just about enough to use the leftover in the pastry and the browned butter dressing)
15g flat leaf parsley
1/2 tsp fine sea salt
Finely grated zest from one lemon
10 tbsp olive oil (plus extra if needed)
(For the sage & brown butter dressing)
40g unsalted butter
Small bunch of sage leaves, around 6, roughly chopped
2 tbsp apple cider vinegar
1/2 tsp dijon mustard
Salt and pepper, to season
(To assemble)
Batch of flaky pastry (see above)
One egg, beaten
One head of red chicory
Method:
Preheat the oven to 180°C fan/200°C/400°F/Gas mark 6.
Prepare the butternut squash by cutting off either end, then chopping into large batons. I like to do this by chopping the squash in half to get two more manageable-sized pieces, then chop these each in half, and scrape out the insides. Save the seeds - we will use these later!
Cut each of these halves into around 6 pieces. You don’t need to peel the butternut squash, although if you are using another type of squash with tougher skin, you may prefer to peel it.
Place on a large baking tray, drizzle with the olive oil and sprinkle over the chilli and salt.
Bake in the oven for 20 minutes, then turn the pieces over and return to the oven for a further 20 minutes. By the end of cooking, the pieces of squash should be nicely soft through and even a little charred in places.
Put these to one side and allow to cool slightly whilst you make the remaining elements.
(For the sage pesto)
Begin by preheating the oven to 180°C fan/200°C/400°F/Gas mark 6.
Spread the pumpkin and squash seeds out on a baking tray, and toast in the oven for 5 minutes. They should look ever so slightly darker in colour and will be making a sizzling noise - they may need a little longer, but be careful not to burn them!
Allow them to cool slightly before combining with the herbs and blitzing in a small food processor. If you don’t have one, then chopping finely together also works (although I can recommend one of these little processors!). Add the salt and lemon zest, followed by the oil. I’d recommend adding the oil slowly whilst blitzing or stirring to get to the consistency you want. It shouldn’t be too oily or it’ll make your galette soggy, so aim for a thick pesto.
(For the sage & brown butter dressing)
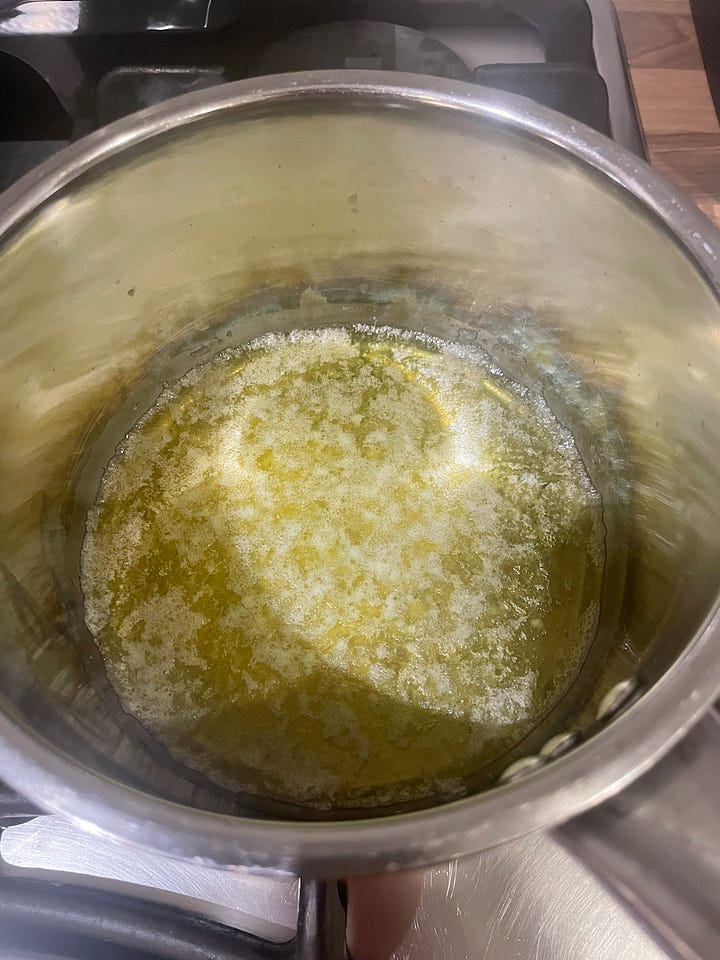
Begin by melting the butter in a small saucepan. Once melted, keep on the heat until it starts to bubble, swirling the pan every now and then to distribute the heat.
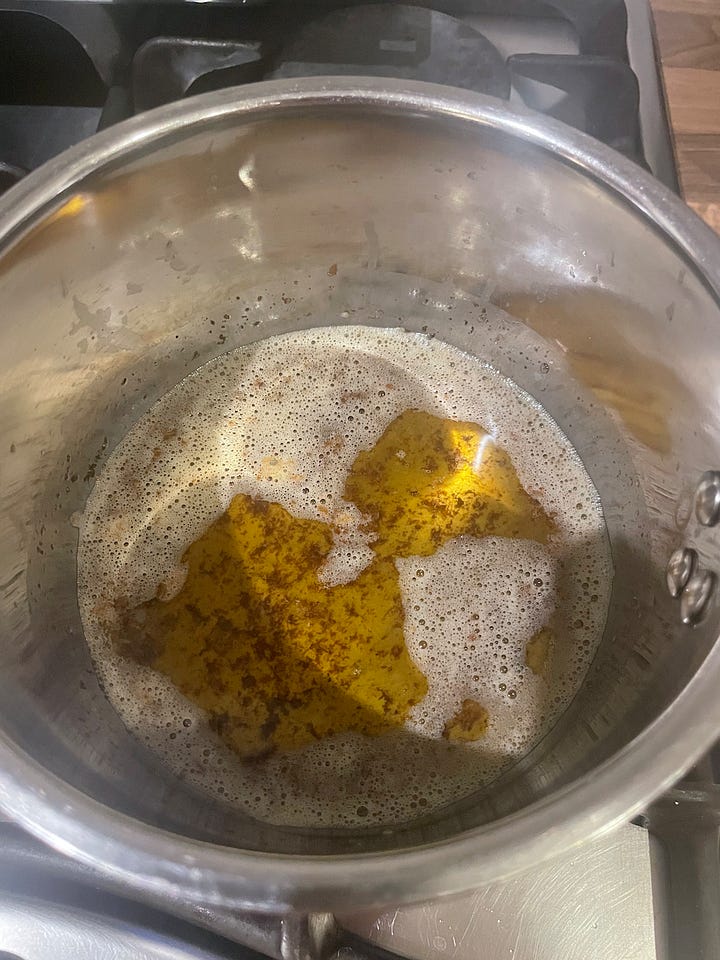
Keep watching as the butter begins to foam, before turning a golden brown colour. It will also smell nutty.
Once golden brown and releasing a nutty aroma, remove from the heat and allow to cool for a few minutes.
Add in the chopped sage leaves and allow to infuse for 5 minutes.
Finally, add in the cider vinegar, mustard, salt and pepper and mix well to emulsify.
At this point, I like to strain the dressing to remove the pieces of sage, but this part is optional.
(Assembling and baking the galette)
Preheat the oven to 180°C fan/200°C/400°F/Gas mark 6.
Begin by rolling out the pastry on a lightly floured work surface. You want to roll it into a rough circle - the best way to do this is to roll from one side, then turn the pastry. This helps to roll it evenly, prevent it from sticking, and create a circle shape. We are aiming for the pastry to be no thicker than 5mm.
Leaving a few cm border around the edge, spoon on a generous amount of the sage pesto.
Place the roasted butternut squash pieces on top - you can arrange these however you please. Add another few blobs of the sage pesto on top to ensure a good spread.
Fold the outer pastry into the middle to create your ‘crust’. Don’t worry, this part doesn’t need to look neat, although you can trim the edges to make them look neater if you like (I prefer the rustic look though!).
Brush the crust with the beaten egg. You won’t need much of the egg, so save it for making scrambled egg for breakfast.
Bake in the oven for around 25 minutes - the crust will look a deep golden brown.
Meanwhile, peel the chicory leaves apart and toss them in the brown butter dressing. Remove the galette from the oven and pile these over the top, then return the galette to the oven for a further 5-10 minutes until the galette is golden all over and the chicory has softened.
Allow to cool slightly before serving. I served mine with all the remaining bits (squash, pesto, and chicory leaves) tossed together with other salady bits.
Happy galette making! This week was a bit of a recipe bonanza, and I hope that even if you don’t try the whole thing, you can cherry pick the recipes you like and use them to create your own delicious things. Next week we’ll be stepping up the seasonal approach and delving into something even more festive, so I hope to see you there.
In the meantime, if you have any questions about the recipe or anything Pastry At Home related, please feel free to comment below or send me an email!
Speak soon.
Annabelle
x


