Hello!
Welcome to another week of Pastry at Home, your weekly newsletter for nailing all things pastry.
This week has been a pretty full on one. We are in the process of moving and so every spare hour has been filled with sanding down skirting boards, ripping up carpet and repainting walls. It also means we’ve had to pack up our current place, so it feels a little like a bomb has gone off and exploded the contents of our cupboards into the flat. I don’t work very well in mess - if the flat feels messy, my brain feels messy. As my boyfriend will attest to, it doesn’t take much for my brain to feel messy anyway. I often have a lot of ideas and things to do swirling round in my head and simply not enough time to do them all. Perhaps your brain is feeling a little messy too, in which case I can highly recommend taking a little time out to do something relaxing. Maybe a little walk, or maybe some baking?
With this all in mind, I wanted this week to be fairly simple and above all FUN. And these little trifle bakewells are (I think) fun in pastry form. They look fun and they taste fun.
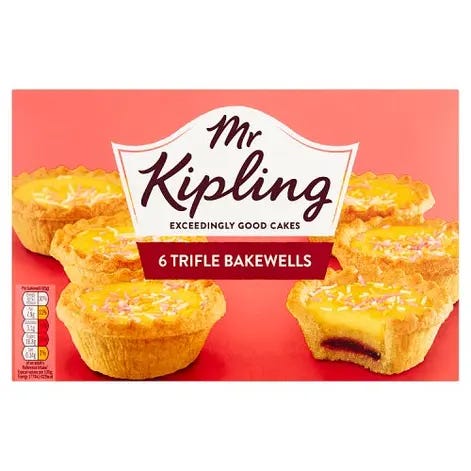
The inspiration for these is none other than Mr Kipling. People often ask me if I have a guilty pleasure as a pastry chef. To be honest, I’m a subscriber to Nigella’s belief that we should stop using this phrase. I also read a fab essay by
this week on the subject too. But body politics aside, I think a Mr Kipling cake in any form would be considered a guilty pleasure for a pastry chef. Guilty maybe because I haven’t made it, or maybe because it is considered processed junk. But honestly I have zero guilt about eating cakes made to look unnervingly perfect and crammed full of sugar. They are nostalgic and fun, even if they do make my teeth hurt.By far, the best Mr Kiplings are the trifle bakewells. Layers of plum and raspberry jam, vanilla almond sponge, and a custard topping with sprinkles, all in that signature crumbly pastry case and tin foil. Our family became obsessed with them growing up, and we reinvigorated this obsession last week when I spotted some in Sainsbury’s. Not only were they a very welcome sugar injection whilst painting ceilings (bloody hard work, by the way), they also reminded me that there’s nothing wrong with a smattering of sprinkles to make life fun.
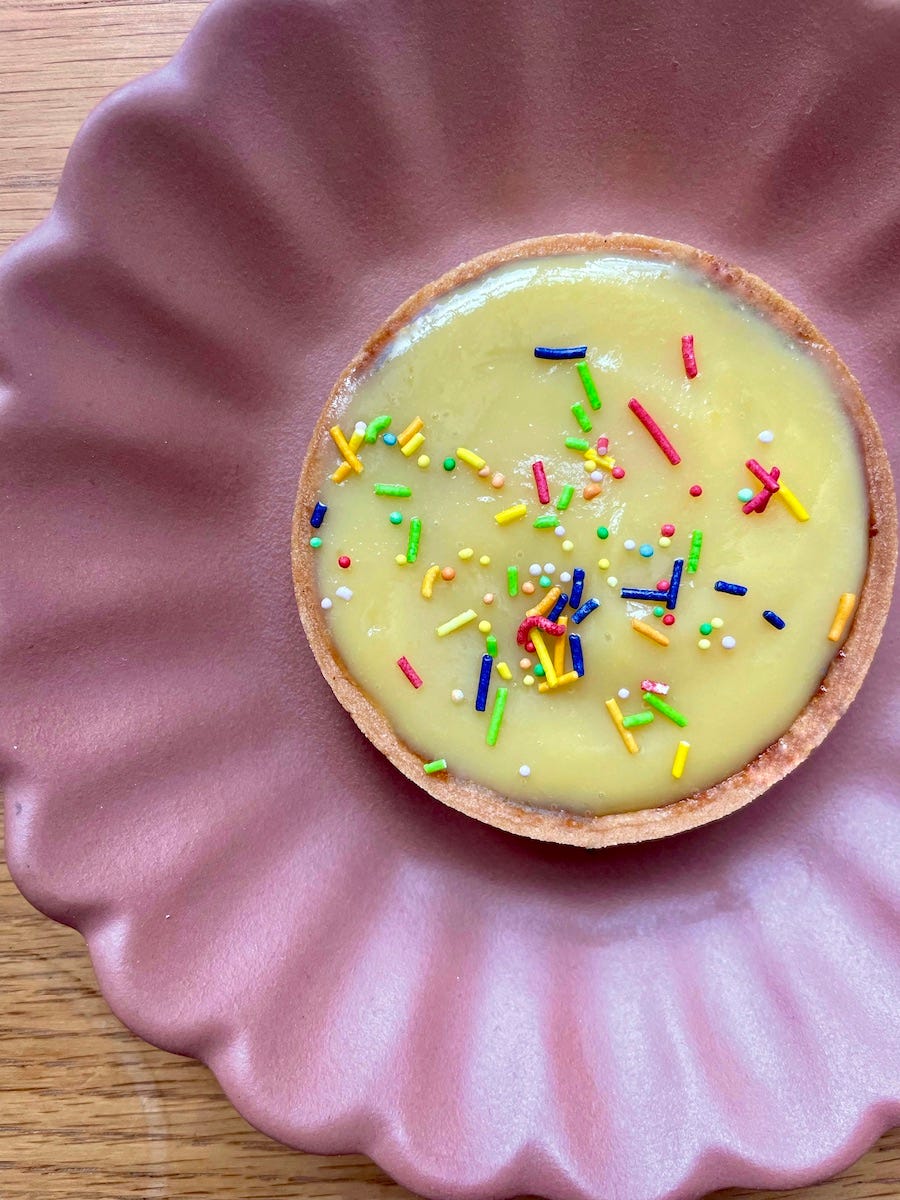
So, here is my little rendition of the trifle bakewell, an ode to Mr Kipling. We’ll use the beautiful pastry cases we made last week, with a layer of whichever flavour jam you prefer (shop bought, but we might cover jam another week), a basic recipe for almond cream, and the iconic custard topping.
A note on almond cream
This is a super versatile recipe, and a great one to have in your back pocket for an easy tart filling. You can adjust the recipe to suit the quantities you need - you’ll need to scale the flour, but the butter, almonds, sugar and egg are always equal quantities. For a richer almond filling, you can combine almond cream with crème pâtissière to make a frangipane, which is also a great tart filling. Or, perhaps switch the almonds for another ground nut. For a simple tart, fill a tart case with almond cream, top with sliced seasonal fruit and bake until golden, then brush with apricot jam.
Trifle Bakewells
The first step is to make your tart cases. Last week’s newsletter runs you through this, from making the pastry to lining your cases and baking perfectly. I’d recommend using individual tart rings like the ones I show in the recipe. But you can use fluted ones, or even make a giant tart to share.
For the almond filling
50g butter
1 tsp vanilla paste (or a vanilla pod)
50g caster sugar
1 egg, beaten
50g ground almonds
15g plain flour
Pinch of salt
1 tbsp brandy (optional)
Method
Begin by creaming the butter and vanilla together with the caster sugar. By this, I mean the sugar and butter should be well combined and a soft mixture.
Add in the beaten egg and mix again. It will probably look split and messy, but don’t panic!
Add in the ground almonds, plain flour and salt and mix to combine.
Finally, add in the brandy. This is optional, but I think any good trifle (in any form) benefits from a touch of brandy.
Put in an airtight container in the fridge until you are ready to use.
For the bakewell tartlets
6x sweet tartlet cases
Jam of your choice, the original uses raspberry and plum (you will need approx 2 tsp per tartlet)
Almond cream, as made above
Method
Preheat the oven to 160°C fan/180°C/350°F/Gas mark 4.
Spoon 1-2 tsp jam into each baked tartlet and spread to cover the base. There should be just enough to cover the base.
Next, put a generous spoonful of the almond cream on top and spread flat. It should fill the tartlet a little over halfway - it will rise slightly in the oven and we need to make sure there’s enough room for our custard topping so don’t overfill.
A side note, this will probably end up looking messy. The jam will mix a little with the almond cream and you’ll possibly end up with a less than perfect looking uncooked tart. Messy is fine. We are making bakewells combined with trifle here, so anything goes.
Bake in the oven for around 10 minutes, until the almond cream is nicely golden around the edges. The key here is not to overbake the almond cream or you’ll lose that slightly sticky middle that makes a bakewell tart iconic.
Leave to cool slightly whilst you make your topping.
For the custard topping
10g Bird’s custard powder (if you don’t have accurate enough scales, this is approximately 1 tbsp)
110g whole milk
25g double cream
A drop of yellow food colouring (optional)
150g white chocolate
Sprinkles!
Method
Begin by gently melting your chocolate over a bain marie or in the microwave. It should be only just melted, don’t worry if there are a few lumps of unmelted chocolate in there. Set to one side.
Put the custard powder into a small pan together with 2 tbsp of the milk. Mix until well combined, then add the remaining milk and cream.
Heat over a medium heat whilst whisking, until it comes to the boil and you have a thick custard. If it isn’t yellow enough for you, add a drop of yellow food colouring.
As a side note, you can OF COURSE make your own custard here. Personally I love the flavour and colour of Bird’s custard, but if you want to step it up then it’s the perfect time to employ those crème pat skills we covered here.
Remove from the heat and allow the custard to cool ever so slightly. Test a little by dipping your finger in - if its too hot to hold your finger in, allow it to cool for longer.
Once cooled enough, pour half of the custard over the melted white chocolate. Using a small spatula, stir quickly in the centre of the bowl. It will look split and messy initially, but pour over the second half of the custard and mix again. It should be a nice smooth, glossy, yellow mix. If it still looks ever so slightly split, you can add a little drop of milk.
Essentially what you have made here is a ganache. We will talk about this another week as there is so much to cover, but it is essentially an emulsion. So, if it looks a little split, it’s probably because the fat and liquid balance in the mix isn’t quite right. A little drop of milk will most likely help, but if you have a stick blender then give it a quick blitz to help emulsify it.
Put a generous spoonful of the topping on each tartlet and spread smoothly with a palette knife (or a spoon). Top with sprinkles, then allow to set at room temperature for an hour or so before eating.
Good luck with your trifle bakewells, and let me know how they turn out. As ever, I’m always here to help troubleshoot.
Thank you for reading, and chat to you next week.
Annabelle x


