Hello!
Once again, a big happy 2023 to you all. I’ve been putting off that return to normality that comes with the start of the year, mainly by leaving the country for a few days and exploring Dublin. We drank lots of Guinness, and ate a whole load of delicious things, really too many to mention, and I celebrated my birthday in style courtesy of my very thoughtful boyfriend.
But the time has certainly come to return to normal life, and so this week has been about easing myself back into that. Getting back into exercise, pencilling in new plans, and getting my head in the game for all things work. The end of Christmas, New Year, and birthday celebrations are never fun, but I do get a certain amount of comfort from regaining a bit of routine.
With routine, I find, comes those little snippets of spare time to try something new. Whether that’s a hobby, or simply loafing around doing very little, its nice to get back a bit of that quiet time that Christmas so rarely offers.
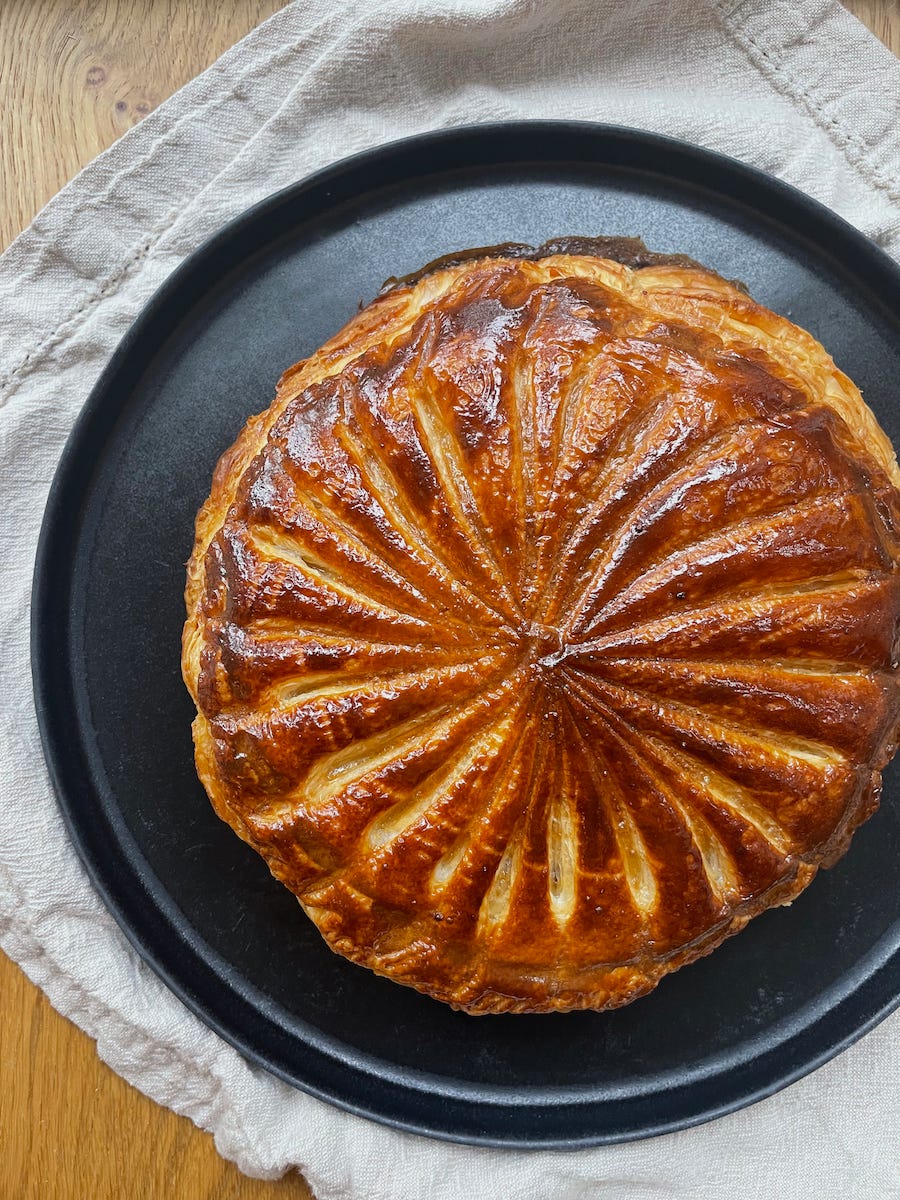
With a little more time on our hands, and with no real motivation to go outside for the rest of January, may I suggest you try your hand at making some puff pastry. Of course, the shop-bought stuff can be handy, but homemade really is the real deal. For the next few newsletters, I am going to share with you everything I know about the beautiful layered stuff, and I’ll be learning with you along the way. Today we are going to cover a classic galette des rois, and over the next few weeks we will have a look at other ways of using puff pastry, how to use those leftover bits of pastry, and attempt to take it to the next level by changing up flours and flavours.
What is a galette des rois?
I’m so glad you asked! The long answer to this question is that a Galette des Rois can take many forms - google it and you’ll see! It translates as ‘King Cake’ or ‘Three Kings Cake’ and is a traditional dessert associated with celebrating Epiphany, usually celebrated around 6th January. The form it takes, and the date on which it is eaten, depends on the country and their own traditions.
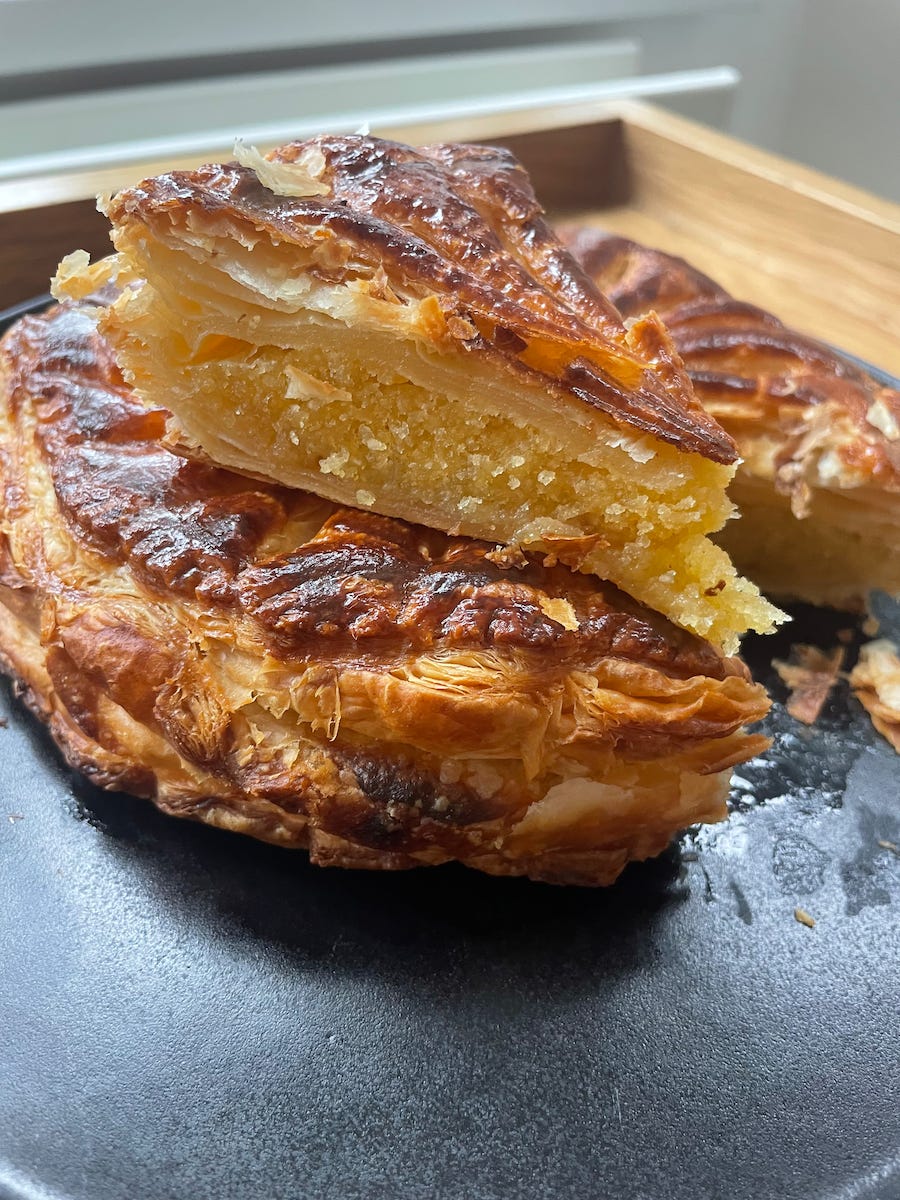
However, the one we are looking at today is generally traditionally made in France, more specifically northern France. Put short and simply, it is a free-form galette made with two discs of puff pastry and an almond filling. Within the almond filling, a little figure or charm (or sometimes bean) is hidden (a bit like a sixpence in your Christmas pudding). Again, the meaning of this charm is largely dependent on the country and their tradition, but generally-speaking it can be seen as a sign of good luck for the person who discovers it!
This week, we are going to make a simple version of the galette des rois. Beautiful puff pastry with an almond filling (the one we used in #7) and a touch of apricot jam.
Puff pastry, the essentials
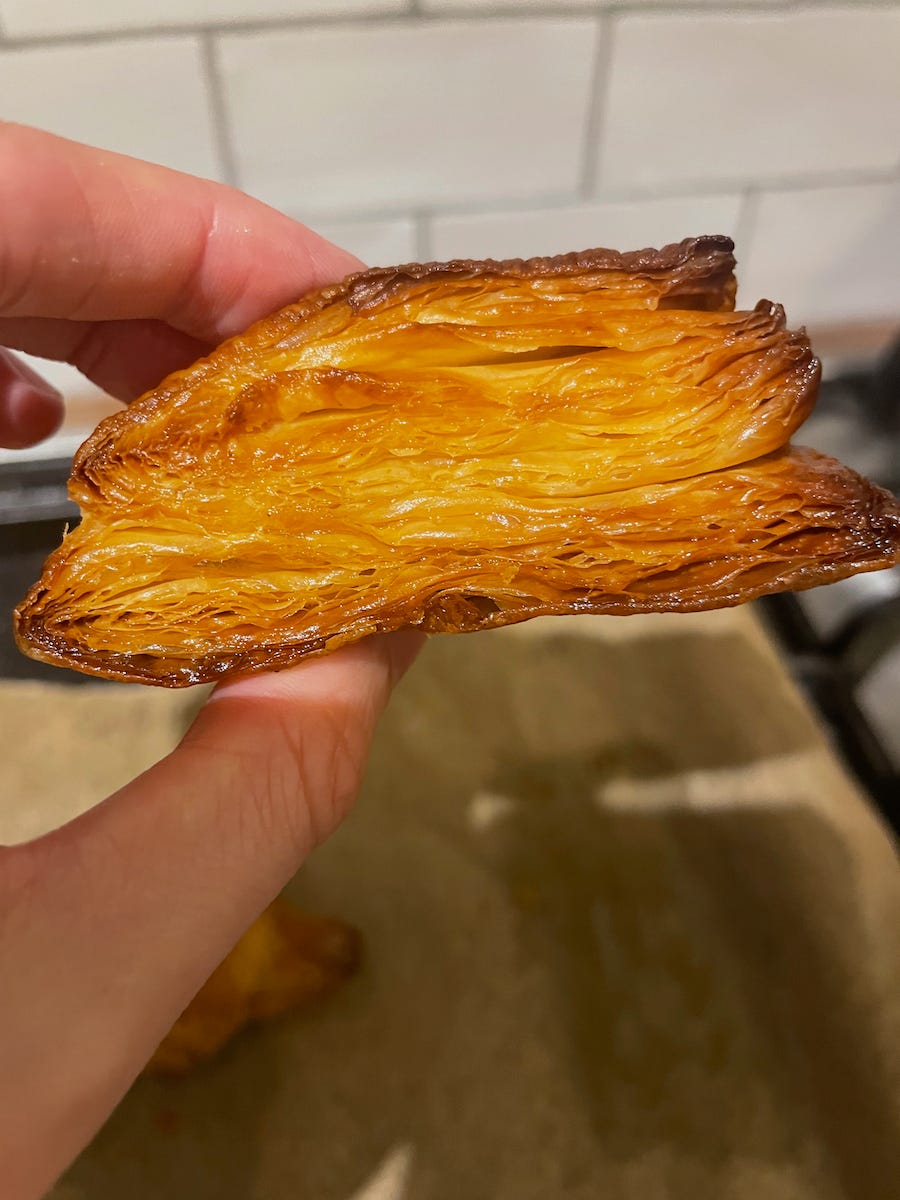
At its simplest, puff pastry is a simple dough with a relatively low butter content, with a sheet of butter folded in to produce those lovely layers. If you joined me for #9 (Sage Galette), you’ll remember we made a flaky pastry by leaving big chunks of butter in the mix and folding the dough before rolling. Puff pastry is this but with more resting, more folds and much more butter. The water content in the butter releases steam when baked, separating the pastry into layers and giving it the rise we associate with puff pastry.
To many people, puff pastry seems a little unattainable. I can assure you, it isn’t! There are just a few tips and tricks to remember before attempting to tackle it:
Leave yourself plenty of time.
Making puff pastry isn’t a particularly laborious process in itself, but it needs plenty of time to allow it to rest in the fridge. You’ll spend longer resting it than actually rolling and folding it, but this resting time is key. When we roll pastry, we generate gluten. This gluten is important for giving your puff pastry strength, but we also need to give the dough time to relax again after rolling. If it hasn’t had this resting time, it’ll shrink back when you try to roll it and when you come to bake it later. Think of it as a sort of muscle memory, so we need to let the dough rest properly to prevent it from doing this.
Keep an eye on temperature.
Just like with most pastry, we don’t want to let it get too warm. If this happens, the butter will start to melt, and when we come to bake it you’ll lose all the lovely layers that you spent so much time incorporating. So, when rolling and folding your pastry, if you think it feels a little warm or soft, put it back in the fridge for half an hour before continuing.
Having said all of this, we also don’t want to let things get too cold either. If the butter in the pastry is too cold, it’ll split and break when we try to roll it and result in uneven layers. If it feels too firm, give it a minute or two to soften before continuing.
The key to puff pastry really is time and patience. Of course, you might not have a whole day to commit to pastry, and this is absolutely fine. If you want to give it a go but have a busy schedule, just factor it in to your days. As you’ll see in the method, you’ll want to allow for two hours between each fold. However, if you leave it longer this is absolutely fine. You could even spread the folds out so you do one each day. The dough will keep in the fridge nicely for a few days so long as it is wrapped well, so don’t feel in any rush to get it all done in one day.
The three key components
Puff pastry consists of three key elements: the détrempe, the beurrage and folds.
The détrempe: a basic dough made with strong white bread flour, a bit of butter and water for hydration, a touch of salt and sugar for flavour, and a touch of white wine vinegar. The vinegar may seem a strange inclusion, but without it our dough will turn a nasty shade of grey very quickly in the fridge. The vinegar helps prevent this and keeps it looking appetising.
Having said this, if you don’t have any in the kitchen, it’s not the end of the world. I have made it before without vinegar and the end product is absolutely fine once baked.
The beurrage: a sheet of butter that is folded into our détrempe. In professional bakeries this often comes in a sheet, but for home bakers we need to make it ourselves. We do this by softening butter and enclosing it in greaseproof paper. In this recipe, I also add a proportion of flour to the butter. This helps to keep the butter at a nice consistency, and particularly helps if you are new to the puff pastry game as it allows for slight fluctuation in temperatures for home kitchens.
Folds: often called book folds, we perform these by rolling out the pastry and folding the dough in on itself. We will look at this when we get to the recipe, but the important thing to note here is that many people will have different methods of doing this. In this recipe, we are going to keep things simple and perform three double folds. I find this gives consistently good, even layers without needing to work the dough too much. As you get more confident, you can branch out and experiment by doing a different number of folds.
Puff pastry
Makes 500g, enough for one 8-inch galette
For the détrempe:
200g strong white flour
1 tsp salt
1 tsp sugar
50g unsalted butter, melted
75g water
1/2 tsp white wine vinegar
For the beurrage:
160g unsalted butter, softened
20g plain flour
Method:
Begin by making your détrempe. Combine the flour, salt and sugar with the melted butter, water and vinegar and bring together to a dough using your hands. Knead briefly until it is well combined and there are no obvious dry patches. Alternatively, if you are using a stand mixer, do so using the dough hook attachment. Don’t work the dough too much - just until it is nicely combined. Place in an airtight container or wrap well and place in the fridge for at least two hours, or overnight.
Half an hour before you are ready to start making your puff pastry, make your beurrage. Soften the butter by beating, then combine with the flour. I find this easiest to do in a stand mixer with the dough hook (we don’t want to incorporate any air into the butter here). However, you can do this by hand with a little extra elbow grease!
Tip the butter out onto a piece of greaseproof paper, place another piece of greaseproof over the top. Fold the edges to create a square around 15cmx15cm. Then use a rolling pin to spread it evenly into the corners. This step is a little fiddly, but don’t worry if it isn’t quite exact. The main goal is to have a square(ish) sheet of butter of even thickness.
Chill the beurrage for 30 minutes, until it is firm but can be bent.
Now is time for the inclusion (adding the sheet of butter into the dough). Roll out the détrempe to the same width and double the length of the butter (around 30cmx15cm), then unwrap your beurrage and place it in the centre. The aim is to enclose the butter within the dough, so your rolled détrempe needs to be long enough to fold both ends into the middle and cover the butter (see images below).
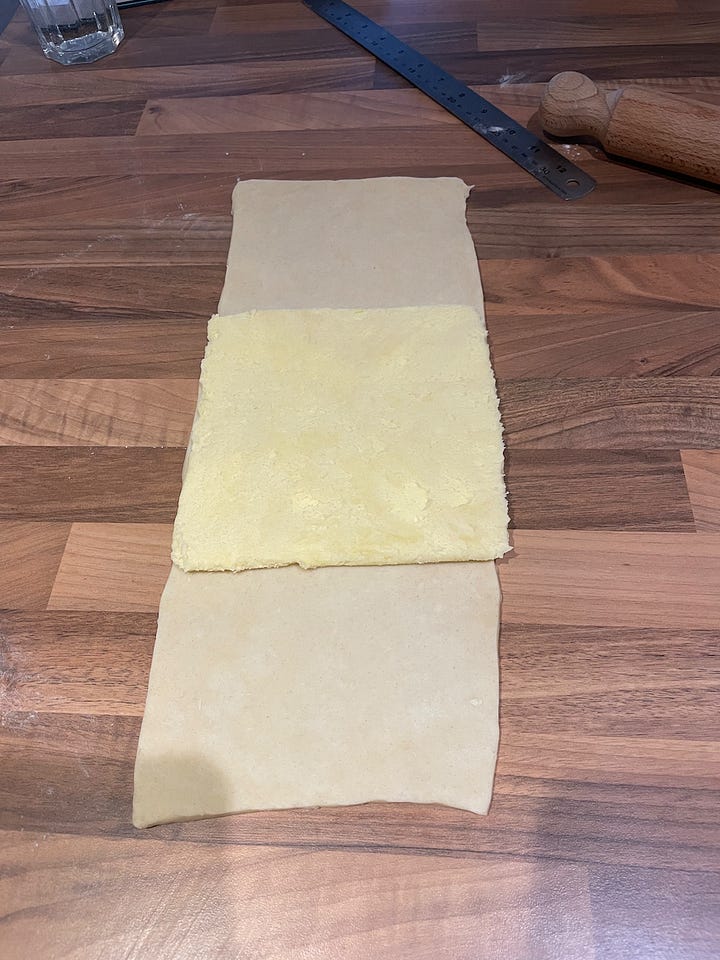
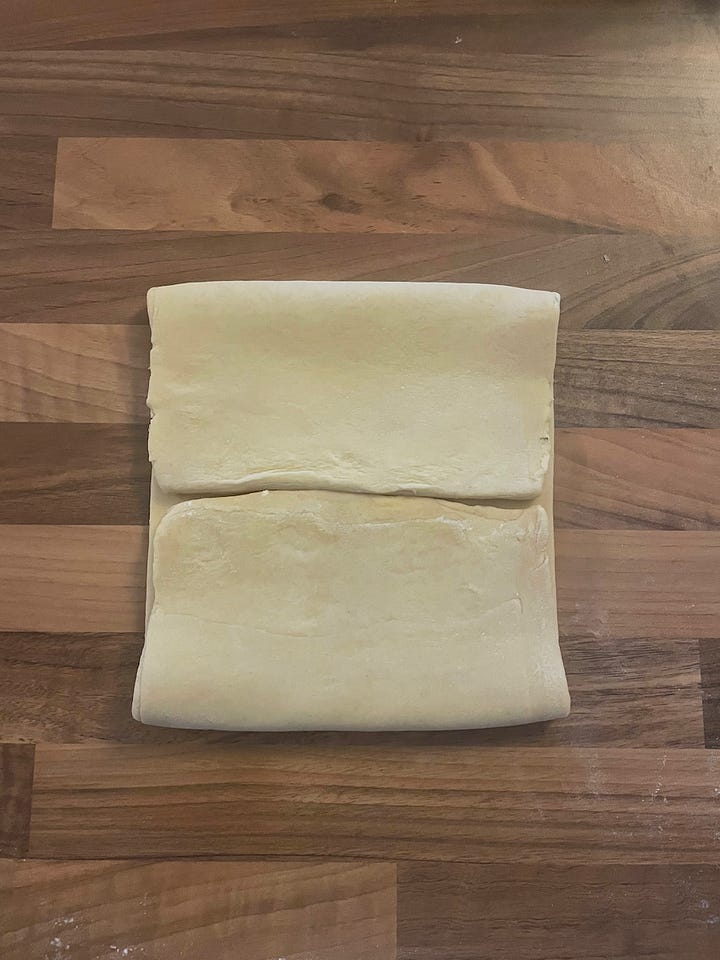
Press down the edges to seal in the butter, then turn the dough 90 degrees so the join is now vertical. On a nicely floured surface, roll out the dough to around 40x15cm, moving the dough around every now and then to prevent it sticking. Fold the top and bottom in towards the centre, then fold in half. Turn 90 degrees, so that the folded edge (the spine of the book, if you will) is vertical. This is your first of three double folds! Wrap it well and place in the fridge to rest for two hours (minimum, or overnight).
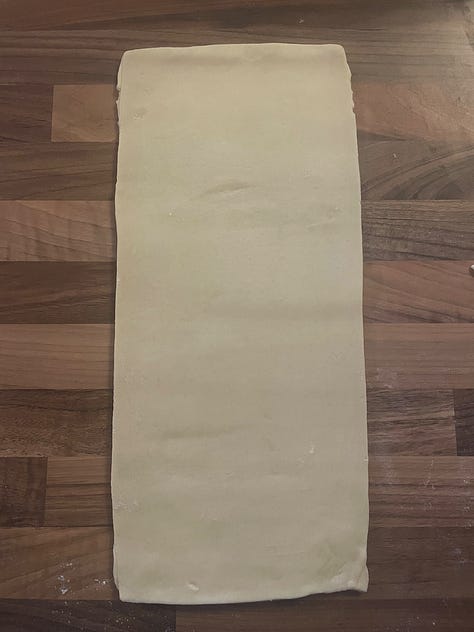
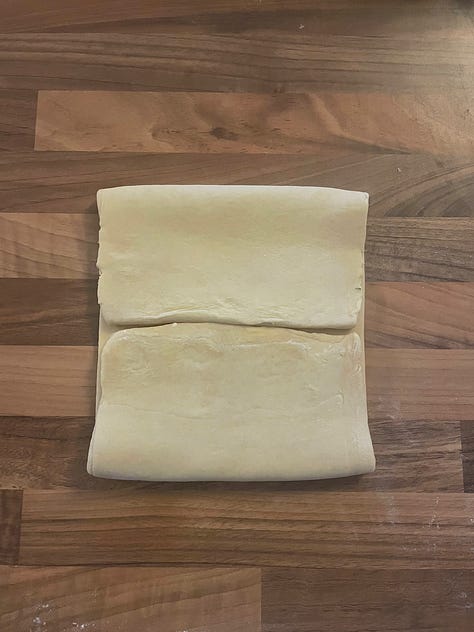
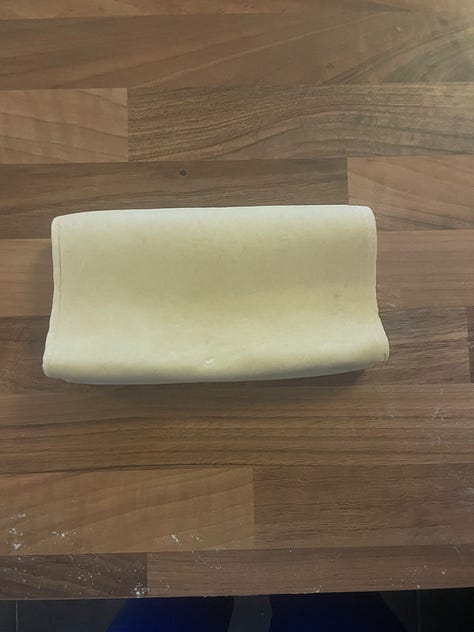
Time for your second fold! Take your pastry from the fridge and flour the surface well. With the folded edge facing vertically, roll the pastry to around 40x15cm. If the edges are very rounded you can trim these to make the dough easier to fold, but keep the trimmings - See the note at the bottom for how to look after them. Fold both ends in towards the centre, then fold in half and turn 90 degrees. Wrap well and place back in the fridge for a minimum of two hours.
For your third fold, repeat the steps above. And your puff pastry is ready! Allow it to rest in the fridge for a minimum of two hours, or better, overnight, before rolling and using as you please.
If at any point in the process the dough feels tricky to roll (either too warm or shrinking back after rolling) put it back in the fridge for another half hour or so. Resting and cool temperatures are key, don’t try to force your dough!
Puff pastry will last in the freezer for around 3 months if wrapped tightly.
Galette des rois
This makes enough for one 8-inch galette
1x 500g batch puff pastry (as above)
50g butter
1 tsp vanilla paste (or a vanilla pod)
50g caster sugar
1 egg, beaten
50g ground almonds
15g plain flour
Pinch of salt
2-3 tbsp apricot jam
Plus one egg, beaten with a pinch of salt for finishing
Method:
Preheat the oven to 200°C fan/220°C/425°F/Gas mark 7.
Begin by rolling your puff pastry to around 3mm thickness. You want it to be large enough for 2x8 inch circles, so bear this in mind whilst rolling out. Cut the sheet of puff pastry in half so you have two rough squares. Chill in the fridge for 30 minutes before going any further.
This step is important - if you don’t allow the pastry to rest at this point, your pastry will shrink when you cut the circles and you’ll end up with ovals!
Meanwhile, make your almond filling by creaming the sugar and vanilla together with the caster sugar. Add in the beaten egg and mix again, then add in the ground almonds, plain flour and salt and mix to combine. Put in a piping bag (if you have one) and chill until you are ready to use it.
Using a cake tin (or bowl/plate of equivalent size), score around or press down lightly onto one of your pastry sheets to get an indication of your circle - this will help you with the next step.
Spread the apricot jam thinly onto the sheet of puff pastry, leaving a border of approximately 2cm. Use the outline of the circle as a guide.
Pipe the almond filling on top of this - I like to do this in a spiral pattern to get the most even spread. However, if you don’t have a piping bag, you can dollop it on with a spoon and spread it gently with a knife.
Using a pastry brush (or the tip of your finger if you don’t have one!), spread an even layer of your egg wash around the border.
Place the second sheet of pastry over the top and press around the edges to join them. Make sure to go right up to the almond filling in the centre to get rid of any air bubbles and create a nice dome shape. Using the cake tin or plate you used initially, cut around with a knife to create a circular galette. Save your pastry scraps! See the note at the bottom for how to look after them.
Moving around the edges of your pastry, press the back of a small knife in to create little indentations. Spread these a few cm apart - these will create a nice flower-like finish to your galette and will also help ensure the two sheets of pastry are nicely joined.
Egg wash the top of the galette and make a little hole in the middle to allow steam to escape.
At this point, how you choose to decorate your galette is up to you. I like to stick to a fairly traditional pattern, using the tip of a small knife to gently score from the centre to the little indentations around the edge in a sweeping pattern. However, you can be as creative as you like!
Egg wash once more and chill in the fridge for around 15 minutes, longer if you have taken a while to decorate your galette. At this point, you can leave it in the fridge for a day or two before baking if needed.
Bake for 20 minutes, or until a deep golden brown colour.
Allow to cool slightly before serving, or eat cold! It is lovely with a simple ice cream and selection of fruit, but would definitely work well with this indulgent brandy custard too…
A note on your trimmings: don’t get rid of these, as next week I will be sharing a recipe for using these up. To store them, line them up neatly together and wrap well. Most importantly, don’t scrunch them into a ball! By doing this you will ruin the layers, making the dough unusable.
Good luck with your puff pastry making, and, as ever, please don’t hesitate to get in touch with any questions or difficulties. I’m looking forward to seeing some of you at our supperclub next week too! Tickets are now sold out, but we are planning lots more events in 2023. In the meantime, here’s a little sneak peek of the menu…
Speak soon,
Annabelle
x


